-
-


-
Recent Articles
Building Your Defence: Full Backs
 The modern full back is quickly becoming one of the most important players on the team sheet, infact even back in the days of Brian Clough, fat ed' argued that because of the space these players get in the final...
False Nine Tactics
 When we think about modern football trends, we think about the fall of the 4-4-2, the introduction of inverted wingers and the rise of the 4-5-1. But there is one other tactical rise that seems to have...
An Open Letter To The Football Manager Community
 To view Sports Interactive's response, click here FM-Britain will no longer be producing regular content. Sports Interactive have objected to our content model of charging for annual strategy guides,...
How Will Jose Mourinho Manage at Real Madrid? (Part 7)
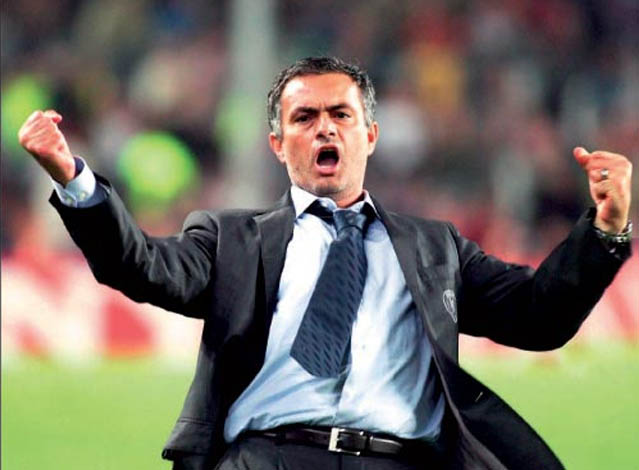 Last time around I showed you the gaping holes in my tactical plan. Against smaller teams, my players were not imposing themselves enough on the game, nor were they able to break through more disciplined...
From Giant to Underdog: Managing a Bulgarian Powerhouse (Part 3)
 After setting the tactics for our team in the previous post, we'll look how they are going to play out in a game situation. Our first friendly will give us a chance to see how our players will handle the tactics. The...

JOIN 12,748 READERS - SUBSCRIBE NOW TO OUR FOOTBALL MANAGER NEWSLETTER
Get the latest FM news & best community content delivered directly to your e-mail inbox!
Tactical Bible ’08: Tactic Tweaking III
Written by: Matt vom Brocke
Category: In-Match
Posted on: August 13, 2007
August 13, 2007
Tactic Tweaking III
Helpful tweaks for fine-tuning tactics
The tweaking articles are simple collections of bite-sized topics that cover several settings and ideas that may help you to fine tune your tactics. These little ideas can be very helpful and, if implemented correctly, boost the success of your tactics immensely.
Contents
Long shot efficiency
Full playmakers
Player Swapping
Long shot efficiency
Having everyone on low long shots means they only take a long shot when there’s a) no other option or b) it’s a dead-cert to go in. That definitely helps, though the downside is that quite a few of the long shots appear to be out of desperation rather than inspiration.
If you have a midfielder who is very good at long shots, it may be worth keeping him on mixed long shots. Many player prefer to have the central midfielders on mixed setting when e.g. playing a 4-4-2.
However, these setting should be reviewed in connection to the team and individual settings. If you are playing on the counter or defensively, higher long shot settings may encourage the players to look for a hasty go on the goal instead of playing a good pass, low time wasting may increase this even more.
If you are using high creative freedom or even free roles for a player, you should restrict long shots to rarely for an attacker or AMC since the player has your permission to make his own decisions anyway. If this is combined with an extra invitation to score screamers at any occasion, you will see a large number of wasted shots off target from hopeless positions.
Defensive midfielders/MCds with decent long shots often seem to be ideally suited to score screamers when playing with HUB instructions. This can occur quite often in attacking situations if the DM holds up until most of the team is in a good position and eventually opening some space in the defence. Also good playmakers often seem to make a surprising decision and go for a good long shot, much more often then without playmaker instructions. But this should not be an argument to install a playmaker system if you are not aware of the pros and cons.
Important attributes for effective long shot takers:
Long shots
Technique
Finishing
Decisions
First touch
Flair
Composure
Additional supported by according PPM’s
Shoots from distance
Curls balls
Dictates tempo
This is a routine suggested by garyh to create more longshots from midfield:
First:
I make sure the players that i would like to take longshoots mainly my MC set to RWB mixed or rarely.
Setting your players up like this will mean they will be running on to the ball to strike the shoot and is much more affective than someone that dribbles then shoots.
Second:
I will make both MC FWR set to mixed, this way they are behind the play, so when it breaks down they should be outside the box and ready to run on to the ball to try the long shot,
Third:
If my players are not shooting on goal enough, I will lessen the things they have to think about (especially if they have low decisions). This may result in always picking the wrong option, so I will set them up to have maximal 1-2 things to choose from. Example: crossball mixed, longshots mixed, RWB rarely, TTB rarely, making him make less decisions when he has the ball. This should result in making more long shots when around the area.
Fourth:
High creative freedom even on longshots rarely will result in attempting 3-4 shoots a game (as well as free roles).
Fifth:
Try semi-playmaker or playmaker roles for these players. The team mates will look to cut the ball back to him more often on mixed or often forward runs.
Final:
HUB. I think this aids players at times and I have seen some thunderbolts score from players with low long shots (Mainly TM, AMC & DM) - so if all fails try HUB
Full playmakers
While it is obvious that playmakers can be implemented into any tactic and do not need to play a classical AMC position, the effects on the play can differ strongly depending on the formation you are using. The classic 4-4-2 does offer a very well balanced distribution of the ball compared to many other formations like diamonds or multi-strata formations like 4-3-3/4-5-1s or wide and narrow 4-2-3-1s.
This does have severe impacts on the player roles. In many of these formations e.g. the defensive midfielder or the MC/a can be very dominating players and achieve fantastic numbers of passes without acting as a full- or even semi-playmaker. Acting as a semi-playmaker, these numbers of passes may go through the roof, and it needs to be monitored if your team really does take profit from this role (most likely if it is an extraordinary player) or your whole play is focussed and narrowed at one spot of the game, even more so if the team is forced to play through the middle in away games and loses possession there while neglecting important options on the wings.
If you are using such a formation, you should think twice before using a full playmaker, which can even increase the effect.On the other hand, as already stated in long shots, such a player often can create something special and add real value to your team.
If playing a 4-4-2, the decision is slightly easier. The more balanced passing options of a 4-4-2 will not cause the same impacts like other formations will. However, using a playmaker or not is a very important decision and will only offer profit if you are having the best players available.
For the 4-4-2, there are two possible choices: the MC/a and the MC/d. While selecting the MC/a as playmaker will offer more attacking options, selecting the MC/d is more suited for defensive games as he will tend to control the game from a deep role and often slow down the play.
Player Swapping
Player swapping can be a very powerful measure to increase the attack efficiency, especially if playing at home against weaker opposition. Very often dangerous moves are initiated just after player swapped their position. A defender may have been facing a winger who needed to outside him all the time. After the change it may be the case that the player now facing him will cut inside much more often. This can cause some confusion in the defence for a while.
It can be very handy if you are using a target man who has been marked tightly by a very good defender and suddenly does not see much of the ball or looses every header when used as strong target man. Very often a swap instruction suddenly gets him back into play, which can result in a revived attacking power for the whole team.
Swapping wingers often seems to have a very disastrous effect on the opposition, whereas swapping central midfielders can lead to a great variety of the build up play.
If you have two players who can play in central midfield (in an attacking manner) and as a forward/striker that having them swap position can leave a gaping hole in the centre of defence if the player swapped was being tightly man-marked as the AI seems to take a while to realise that a player who was playing striker has dropped into midfield and taken his marker with him.
The same method can be applied with great success if you are having two very equal players that are e.g. great natural AMCs but only auxiliary wingers. While one obviously has to play on the wings, both could swap roles and spend enough time in their best position while confusing the opposition with switching their roles. As a result you also may find out easily who is more prolific in several roles.
Unfortunately, the swapping commands still can make problems if the tactics are switched or subs are made later in the game. You can try to retake the swapping commands and close the player screen before proceeding. This does help sometimes, but unfortunately not always. Also, the player swapping instructions should be checked carefully when downloading tactics, since they often seem to be flawed after downloading.
Tactical Bible Credits
JP, Millie, crazy gra, garyh, wwfan, The next Diaby. Edited by TND and Millie

About The Author: Matt vom Brocke
Matt’s contribution to FM-B as a whole and the tactical area in particular cannot be over-estimated. The writer of the very well-recieved Communication and Psychological Warfare and Creativo set of tactics, Matt is a key member of the Tactical Think Tank and part of SI’s beta testing Dream Team.
You Might Be Interested In These Related Articles:
Tactical Bible ’08: Tactic Tweaking I |
Tactical Bible ’08: Tactic Building Approaches: A Reference Guide |
Tactical Bible ’08: Tweaking II |

Tactical Bible ’08: Analysing AI Tactic Systems |
Download Our Tactical Theorems '10 eBook Absolutely Free

Presenting the most comprehensive tactic design and match strategy guide to the Football Manager series ever created!
Written by FM match engine beta testers, it's 60+ pages of easy-to-read concepts and ideologies for getting your team playing exactly how you want each match! It's been downloaded over 100,000+ times to date!
Find out more information about our tactical eBook
and download Tactical Theorems '10 right now!
Written by FM match engine beta testers, it's 60+ pages of easy-to-read concepts and ideologies for getting your team playing exactly how you want each match! It's been downloaded over 100,000+ times to date!
and download Tactical Theorems '10 right now!
Web discoveries
- UK Casinos Not On Gamstop
- Online Casinos UK
- Best Slot Sites
- Non Gamstop Casinos
- Casino Sites Not On Gamstop
- UK Online Casinos Not On Gamstop
- Slots Not On Gamstop
- Non Gamstop Casino UK
- Non Gamstop Casino UK
- Casino Sites Not On Gamstop
- UK Online Casinos Not On Gamstop
- Casinos Not On Gamstop
- Gambling Sites Not On Gamstop
- Non Gamstop Casinos
- Non Gamstop Casinos
- Non Gamstop Casino UK
- UK Casino Not On Gamstop
- Casino Sites Not On Gamstop
- UK Online Casinos Not On Gamstop
- UK Online Casinos Not On Gamstop
- Brand New Casinos Not Blocked By Gamstop