-
Recent Articles
The Midfielder as Centerback
 Marcelo Biesla and Josep Guardiola are both managers who play a very high line with their respective sides and who both demand that all players be technically proficient with the ball. Part of playing...
Understanding the 4-4-2 Diamond
DEFENCE Despite the fact that there are four ways to play a diamond formation on FM, the differences between them are few and usually subtle. As a starting point, one thing each of them do have...3 at the back and the 4-4-2 Diamond
 Last week Chelsea v Liverpool became the biggest tactical talking point of the season. Liverpool revived the the 3 man defence that Kenny debuted against Stoke. While with the introduction of Torres for £50m...
How To Set Up A Back Four
 Last year, I wrote a guide about how to play a simple 4-4-2. One of the major components of that is the back four. In fact, most modern formations build upon four defenders; two full backs and two centre...
Building Your Defence: Full Backs
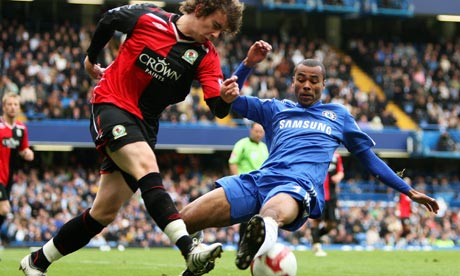 The modern full back is quickly becoming one of the most important players on the team sheet, infact even back in the days of Brian Clough, fat ed' argued that because of the space these players get in the final...
JOIN 12,748 READERS - SUBSCRIBE NOW TO OUR FOOTBALL MANAGER NEWSLETTER
Get the latest FM news & best community content delivered directly to your e-mail inbox!
Tactical Bible ’08: Key Settings On Defence
Written by: Matt vom Brocke
Category: Strategy
Posted on: April 24, 2007
April 24, 2007
An introduction to defensive key settings, based on wwfan’s Tactical Theorems and Frameworks for FM 07 with a few additions from the tactical bible team. If you are struggling with defensive overall success, this article may help you with finding some good points to start with.
Defensive Line
The defensive line is heavily linked to whatever mentality framework you have chosen. Defender attributes, specifically pace and positioning, will allow for some level of line adjustment but it is not recommended that you place the defensive line in a position that unlinks it from the framework. Simply put, the defensive line should be placed at mid-point of the framework mentality. Thus, if you have chosen to implement the attacking framework, with player mentalities ranging from 14-20, you would position the defensive line at midpoint between the two (17). If you have chosen the heavily defensive away formation (1-7), you would set the defensive line at four. This should keep your players closer together and therefore defensively tighter.
If you have quick defenders who have good positioning stats you could happily place the defensive line higher than the mid-point of the mentality framework, confident that their pace and ability to read the game will allow them to cover any counter-attacks over the top with relative ease. However, if they are slower than average, then dropping the d-line back slightly will allow them to cover quick attackers without becoming over exposed to balls over their heads into the space behind them.
Basically, you should find the “natural” setting of your defensive line by looking at your mentality framework. This should be a good “rule of thumb” for you then to adjust to fit the needs of your side and demands from the opposition. Thus, playing a “deep” defensive line for your framework may be two or three clicks below the “natural” setting.
Relatively high defensive lines can be aggressive in regaining possession from the opposition, whereas lower lines can be more cautious. It is not always a simple, however, as playing a high line when attacking and a deeper one for defending. High lines can cause the opposition no end of problems by giving them very little time on the ball. Similarly, lower lines can give you more space to pass the ball around, dragging the opposition all over the place and leaving holes for your forwards to exploit. Personal preference and the demands of the game may change your strategy.
Closing Down
Defenders
Supersaint’s experiments on mirroring closing down with the defensive line produced some good and interesting results, unfortunately our final conclusions differ from his. His matching of the defensive line to average mentality, as explained above, is exemplary and a cornerstone of the theorems, but quality defending relies on low closing down (3-5) as far as most of the Bible contributors are concerned. Defenders on low closing down hold their position and thus require the attacker to do something special to get past them. If they close down heavily, they may well reduce space for the player on the ball, but they also leave space behind them that can be all too easily exploited. Therefore, for both home and away frameworks, low closing down for the defence is preferable, regardless of the standard of your players and the opposition.
However, once you start coming up against some of the AI’s more favoured defensive systems, specifically the 3-3-2-1-1 or the 4-1-4-1, closing down instructions need to change. Both these formations rely on the FC holding up the ball long enough for the rest of the side to catch up with play. If you fail to close down the FC quickly you will find that possession levels remain roughly equal, negating your home advantage. To stop that from happening it becomes imperative to close down the FC quickly, before he is able to lay off the ball to a support man. Using opposition instructions to target the lone striker (close down always) is a good option (in the 3-3-2-1-1 target the AMC as well). Your team will win back possession quickly and you can maintain your attacking pressure.
Fullbacks and wing players (DL/R, WB, ML/R, AML/R)
We should especially look at the closing down for FBs (and wingers). These can be key issues to defensive success. However, closing down has to be regarded with the aspect of tacking and fouls as well as the intention of the tactics (possession – control or quick counter – drawing the opposition into a stable defence).
Having higher closing down for fullbacks especially can be very important for two reasons: It prevents your defence from being bombed with crosses as the higher closing down will actively reduce space for the opposition’s wingers and helps aggressive home tactics win the ball back as quick as possible.
DMCs
If employing a DMC you will need to play higher closing down than if you employ pure MCs. If you follow the above guide, the DMC will be dragged into the defensive line and provide no cover. Therefore, he should be closing down reasonably heavily in front of the defensive line to offer the protection you are looking for.
Tackling
Home Tactics
One of the simplest settings in the game: everybody on normal tackling. This allows the team to contest balls all over the pitch, but relies on a heavy pressing midfield and attack to force the opposition into mistakes by playing quicker balls than they are comfortable with. There is no need, if this works well, to go “hard” and dive into tackles: not only will this give away unnecessary fouls, there’s a good chance the tackle will miss and the player will be given more time on the ball.
Recent experiments have suggested that heavy tackling works exceptionally well against the AI’s most defensive formations (as detailed above). When using these formations, the AI passes slowly and dawdles on the ball. A heavy pressing, heavy tackling approach will consistently win you back the ball in the AI’s half and you will be able to maintain attacking pressure. Any free kicks you concede will be in the AI’s half so won’t pose any danger. Be aware that if the AI is playing more aggressively than anticipated (can happen with the 4-4-2 no farrows) heavy tackling across the board will lead to a lot of free kicks around your penalty area, although you still shouldn’t be conceding penalties.
Away Tactics
Here, things are a little more complex. Combinations of easy, hard and normal give the optimum balance between caution and regaining possession. The only normal tacklers are the central defenders and the goalkeeper. This is because most tackles they make are likely to be in the penalty area and hard tackling gives away too many dead ball situations, so penalties will become commonplace. However, as the midfield and full-backs should normally be outside the box, have them on heavy tackling. It is far more acceptable give away a free kick with a heavy challenge outside the box than allow opposing midfielders the opportunity to outmuscle the midfield and play uncontested passes towards a deep defensive line. Finally, the wingers and forwards are on easy tackling, as their job is to block deep passes and crosses into the area. You don’t want them to risk missing tackles and allowing uncontested balls in; rather you want them to hold their positions and make things as difficult as possible for the AI player in possession. They should, therefore, close down the opposition and harry them rather than dive in.
There are, as with everything in Football Manager, contrasting views over tackling. Some believe that normal tackling will serve its purpose in all situations. By keeping tackling sensible, the idea is that fewer fouls will be given away, which is beneficial especially for sides that are vulnerable to set pieces.
However, others will argue that by tackling hard you give the opposition much less time on the ball, and perhaps even scare them into mistakes if they have low bravery. By using hard tackling you may be able to win the battle in the midfield and therefore dominate possession in the middle of the park and dictate the pace of the game. As with everything, this is a case of personal preference. If you find certain players, or the team as a whole are struggling to hold possession, try the hard tackling system. If you find there are too many fouls being conceded, then move towards a more normal framework. Your discretion and managerial style should help you decide.
As a further option, you could try using easy tackling in midfield for all players except the more defensive central midfielder (MC/d) or DMC. This solution will probably end up lowering your possession percentage since your midfielders may not regain the ball as often. However, if you are playing a very technical style, you can afford to sacrifice a bit of possession (which should be high anyway, considering the skill of your side) on the basis that you can avoid fouls and conceding free kicks in crucial areas. This type of approach can work quite well against the desperate 4-2-4s that the AI throws at you near the end of games as it guarantees players staying between the ball and goal and should win a high percentage of actual tackles, so when you do try and win the ball a quick counter is always on.
Forward Runs
The way forward runs works is a key change in the match engine between ’06 and ’07. In ’06, leaving your forwards on high forward runs was fundamental to their settings and guaranteed a lot of goals. Now, all it guarantees is a lot of offsides. The best settings for forward runs seem to be (though this is by no means definitive and other opinions are more than welcome) as follows:
GK: Rarely
DC: Rarely
FB: Often for aggressive home tactics, Mixed at home, Rarely away
MCd: Rarely, Mixed when struggling to break down the 3-3-2-1-1 or 4-1-4-1
Time Wasting
Defensive line and time wasting work well when mirrored. If you choose the home framework, with the defensive line ranging from 15-19, then time wasting should be set at between 1 and 5. Likewise, as the away framework is designed with frustrating the opposition in mind, time wasting should be at 15-19. The mixed time wasting settings for the attacking away framework work exceptionally well, with players attacking in the last 10 mins when a goal down, but time wasting if they are a goal up. The difference with the away framework is that your players will time waste if the scores are level.
Like the defensive line settings we described above, however, this is a “rule of thumb”, not a definitive instruction. Some managers have moved to a more neutral setting for time wasting and then adjust this depending on whether they need a goal or want to kill the game off. As the in-game tips suggest, however, moving to a very high time wasting approach too early may come back to bite you.
A time wasting setting of 10 offers you the following. Any player with decent decision making stats will begin to time waste with about 15 mins to go if the scores are equal or you are ahead. It is a good starting setting, but remember to change it if you want to chase a game you think you should win.
Width
Width can be a key setting. Even if passing and width are linked in wwfan’s RoO theory, it can be worth the effort to adjust the width for defensive formations. There are still hints that mirroring width and time wasting can work for different systems like RoT. This is especially important for a “shut-up-shop”/kill game system, which will always profit from a very narrow width and high time wasting, no matter which mentality system you are using, be it RoO/global or RoT/split.
Almost any defensive system will profit from a low width, as well there seem to be some formations like a 4-4-2 diamond which are working better with narrow width to close the gaps in midfield that occur between the DMC and AMC. Setting a narrow width here will increase the defensive support of the wingers and save both AMC and DMC from getting isolated.
Tempo
Tempo should never be completely overlooked as a defensive tool. Its primary aim is obviously an attacking one, dictating the pace of play with the ball, but it can also be used to dictate the pace of the game in general. A higher tempo is likely to make your players more eager to get the ball and do something with it. This is similar thinking to playing a higher defensive line to harry the opposition and regain possession quickly.
Clearly there are pros and cons to using a higher tempo. Although you may get the ball quicker, or at least give the opposition less space to play in, you are likely to use the ball too quickly and give away possession. There’s also a great danger that players will close down too much and leave gaping holes in defence. However, against teams that are playing a slow tempo this might help you to harry them that little bit extra.
This policy is similar to one that many managers use where they mirror the instructions given in the scout report (e.g. if it says a team play a fast tempo game, you play a slow tempo game, they play defensive, you play attacking etc.). It’s not a vital strategy, since, equally, many managers stick to their own game plan. However, a quicker tempo and counter-attack may very well nick you a goal towards the end of a game; two-nil is always more comfortable than one-nil.
Try Through Balls
Although ostensibly an attacking option, through balls by definition play the ball into the space in front of a player running forwards. If you have reduced forward runs to a bare minimum, then you need to do the same for through balls as they will be constantly intercepted by the opposition. Direct through balls to breaking forwards are ideal, but players set to short passing playing through balls to stationary team mates is asking for trouble. Likewise, in a defensive system, a player with crossing set to often will invariably be crossing into a box with none of your players attacking space and possession will be lost. As a rule of thumb, the more defensive you want to be, the less forward runs, through ball and crossing the better. You will probably still want an attacking outlet, which arguably should be direct balls to breaking FCs or wingers. Working with these settings to the specifics of your player types is fundamental in designing a quality defensive strategy.
Tactical Bible Credits
wwfan, Justified, Millie, The Next Diaby. Editor: TND, Millie
About The Author: Matt vom Brocke
Matt’s contribution to FM-B as a whole and the tactical area in particular cannot be over-estimated. The writer of the very well-recieved Communication and Psychological Warfare and Creativo set of tactics, Matt is a key member of the Tactical Think Tank and part of SI’s beta testing Dream Team.
Download Our Tactical Theorems '10 eBook Absolutely Free

Presenting the most comprehensive tactic design and match strategy guide to the Football Manager series ever created!
Written by FM match engine beta testers, it's 60+ pages of easy-to-read concepts and ideologies for getting your team playing exactly how you want each match! It's been downloaded over 100,000+ times to date!
Find out more information about our tactical eBook
and download Tactical Theorems '10 right now!
Written by FM match engine beta testers, it's 60+ pages of easy-to-read concepts and ideologies for getting your team playing exactly how you want each match! It's been downloaded over 100,000+ times to date!
and download Tactical Theorems '10 right now!
Web discoveries
- UK Casinos Not On Gamstop
- Online Casinos UK
- Best Slot Sites
- Non Gamstop Casinos
- Casino Sites Not On Gamstop
- UK Online Casinos Not On Gamstop
- Slots Not On Gamstop
- Non Gamstop Casino UK
- Non Gamstop Casino UK
- Casino Sites Not On Gamstop
- UK Online Casinos Not On Gamstop
- Casinos Not On Gamstop
- Gambling Sites Not On Gamstop
- Non Gamstop Casinos
- Non Gamstop Casinos
- Non Gamstop Casino UK
- UK Casino Not On Gamstop
- Casino Sites Not On Gamstop
- UK Online Casinos Not On Gamstop
- UK Online Casinos Not On Gamstop
- Brand New Casinos Not Blocked By Gamstop


